
Regular Maintenance Detailing Guide, Thanks to Detail Depot
Step 1 – Wheels
I generally start by cleaning the wheels as most wheel cleaners work best when the wheel is dry, but this is not always the case. Spray a light coating of the cleaner on the wheels and let it soak and work away for about 5 – 10 mins. I use this time to setup the rest of the gear I need to wash the car, hoses, water blaster etc….Once the wheel cleaner has fully soaked in I use a wheel brush to agitate the brake dust, this step is to make sure all the brake dust has been affected and loosened by the wheel cleaner. Before washing off the cleaner use another wheel or tyre brush to give the tyre a quick scrub. The last step is to wash the cleaner off. Water blasters are ideal for wheel cleaning as they can cut through built up brake dust left on the wheel.
Recommend CarPro Product – CarPro – Iron X – Iron Filings and Contaminants Cleaner – 500ml
Recommend Chemical Guys Product – Chemical Guys – Signature Series Wheel Cleaner
Important Tip – The main reason I start with the wheels is that brake dust is basically tiny bits of metal, and if they get on any sponge, wash mitts etc, they will scratch the paint and leave swirls.
The pre wash is an extra step to some people but vital to others, The goal of the Pre Wash is to reduce the amount of contact you have with your vehicle’s paint. The less scrubbing or washing you do the less chance there is that you will rub dirt into your vehicle’s paint, which in turn creates swirls and scratches. The Foam will loosen the dirt and then flow off when you spray it down. This step is one of the most important steps if you want to reduce the amount of damage that could be caused to your paint when you wash it down later.
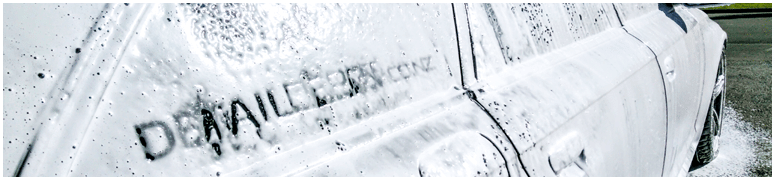
You generally need a water blaster with a snow foam lance or a straight hose attached foam gun and a foam wash product. Put 4 or 5 cap fulls of the wash product into the snow foam bottle and fill it up with warm water. Next step is to coat the car in a nice thick layer of foam. It will not take long to completely cover the car, repeat this and coat the car several times until your mixture of wash product and water is gone. Make sure to coat the wheels and under the wheel arches too.
Recommend CarPro Product – CarPro – Reset – Intensive Car Shampoo – 500ml
Recommend Chemical Guys Product – Chemical Guys – Honey Dew Snow Foam Cleanser
Important Tip – When buying a water blaster always make sure it comes with an attachment for automotive use, some spray attachments will not be suitable and could damage your vehicle’s paint.
Step 3 – Let it Soak
Now that you have coated your vehicle from head to toe, you just need to let the foam do its job. While it’s soaking it is a good time to make sure the foam has worked its way in everywhere. Take a detailing brush and rub the foam over and into any small areas, badges, logos, vents etc… This will make sure that foam gets a chance to soak into dirt all over the vehicle.
Step 4 – Two Bucket System
Now that the Pre Wash Foam has soaked into all the dirt, you are ready to wash it all off. This is one of the more important steps, as its the main step where you have the most contact with the car, and brings with it more potential to scratch or put swirls into the paint. The foam will have loosened the dirt in the last step and this step is just to make sure you wipe it all off. But when you wipe it off you want to make sure it stays off and does not go back on to your sponge / wash mitt and then get wiped back onto the vehicles paint, this is usually the main cause of swirls on most vehicles paint. The two bucket system will drastically decrease the possibility of putting dirt back on your vehicle and reduce any chance of damaging your paint. It’s pretty simple, one bucket is for your clean sponge / wash mitt to pick up water and wash product and the other bucket is to clean your sponge / wash mitt and remove the dirt you just wiped off the car, then you put your clean sponge back in the clean bucket and keep repeating until the job is done.
Recommend CarPro Product – CarPro – Merino Wool Wash Mitt
Recommend Chemical Guys Product – Chemical Guys – 2 Bucket Wash Kit
Important Tip – Try to have different cloths for the different stages as they are required. Once used I throw them into a plastic bin, so that I do not use that cloth again during this cleaning process. Once finished I then chuck all my cloths in the wash and clean them before the next wash day.
Step 5 – Spray it Down
Once you have wiped every square inch of your vehicle, its time to spray all your cleaning products off. Its a pretty straight forward step, I generally start on the roof and work my way vertically down the vehicle to the tyres, But each to their own on this one.
Step 6 – Drying
This step for most is where they let the car air dry. We are after that showroom shine finish and to get that you need to dry of your vehicle. You will need either a microfiber drying towel or chamois. Both are fine, it’s just down to what you prefer to use. One thing to note when you buy towels or chamois, make sure they are very bright in colour, this will help to show up any dirt still left on your car. Ideally when you dry off your car the towel or chamois should not be dirty, it should only be wet if it’s dirty then you need to alter how you did the last few steps as the car is still dirty. This is another major factor in creating swirls in your paintwork, as the dirt on the towel just gets rubbed back into the paint as you move along your vehicle.
Recommend CarPro Product – CarPro – Fat BOA – Green Plush 800gsm Microfibre Drying Towel – 60 x 35cm
Recommend Chemical Guys Product – Chemical Guys – Huge SUV Microfiber Drying Towel
Step 7 – Quick Detailing Spray
The next step is to increase the protection of the paint during regular waxing. Doing a full polish and wax is not always ideal as it takes a lot of time, so in between major waxing, it is good to use a Quick Detailer product to help maintain the protection that the wax already provides. I have two microfiber towels for this process, a polishing cloth which is usually blue and a buffing Cloth which are usually yellow. Spray on your detailer product, spraying it on a few panels at a time, rubbing it in with the blue polishing cloth. I will work my way all over the vehicle before switching to the buffing cloth. The buffing cloth with brings out that showroom shine you have been after.

Recommend CarPro Product – CarPro – Reload – Silica Spray Sealant – 500ml
Recommend Chemical Guys Product – Chemical Guys – Hybrid V7 Spray Sealant & Quick Detailer – 473ml
Important Tip – If you are working on several vehicles, try have separate wash mitts or cloths for each vehicle so that the dirt from one vehicle is not transferred on to the bodywork of another.
This entire process takes me around 2 hours. And the results last for the majority of the week with regular driving, until the next wash. And if you have spent the time on polishing your vehicle, a routine like this would help you to prolong its new finish.

The Detail Depot. Official distributors of Chemical Guys, Car Pro and Dodo Juice in New Zealand.
0 Comments on "Regular Maintenance Detailing Guide, Thanks to Detail Depot"